

- Beginning
- What You'll Need
- Installation Guide: Step by Step
- 1. Getting Ready and Making Plans
- 2. Choosing the Ideal Location
- 3. Setting the Stage: Marking and Measuring for Your Fountain
- 4. Check for Utilities: Avoid Unpleasant Surprises
- 5. Getting the Site Ready
- 6. Excavating and Preparing the Hole
- 7. Adding a Sand Layer and Positioning the Basin
- 8. Installing the Base
- 9. Setting Up the Basin and Pump
- 10. Mastering the Plumbing: Waterways and Connections
- 11. Final Assembly
- 12. The Final Touch: Watering and Testing Your Fountain
- Advice for a Smooth Installation
- Conclusion
- Common Questions
Building an outdoor water fountain is a manageable DIY project that can add a touch of elegance to your garden.
You’ll need a few simple tools, materials like a basin, pump, and plumbing supplies, and a flat site to set up your fountain.
It’s crucial to plan ahead, including picking the perfect spot and checking for utilities, before you start.
Setting up the basin and pump is a vital step, and making sure the plumbing connections are correct is essential for a working fountain.
Beginning
Water features have a unique charm that can make your garden more inviting. A water fountain, in particular, can be the centerpiece of your outdoor space, adding a touch of nature and serenity. Today, we’re getting our hands dirty to explore the step-by-step procedure for building an outdoor water fountain. Let’s make your dream a reality and make your outdoor space the talk of the town.
What You’ll Need
|
What You Need to Install a Water Fountain |
Purpose |
|---|---|
|
Shovel |
For digging the hole |
|
Level |
To ensure everything is straight |
|
Tape Measure |
For correct positioning |
|
Wheelbarrow |
To transport materials |
|
Garden Hose or PVC Pipe |
Sturdy hose or pipe to withstand pressure and constant water movement |
|
Foundation Materials: Bricks, Gravel, Sand |
To create a level base, support the weight of the fountain, and prevent tipping or sinking |
Installation Guide: Step by Step
1. Getting Ready and Making Plans

Before we start, we need to make a plan. Just like you wouldn’t build a house without a blueprint, you shouldn’t install a fountain without a plan. Draw a sketch of where you want your fountain to be. Consider how much sunlight it will get, how close it is to a power source, and how it will fit in with the rest of your landscaping.
2. Choosing the Ideal Location

Pick a location that calls to you. Above all, ensure it’s a flat surface to stop your fountain from tilting. If it’s not flat, you’ll need to do some excavation and leveling.
3. Setting the Stage: Marking and Measuring for Your Fountain
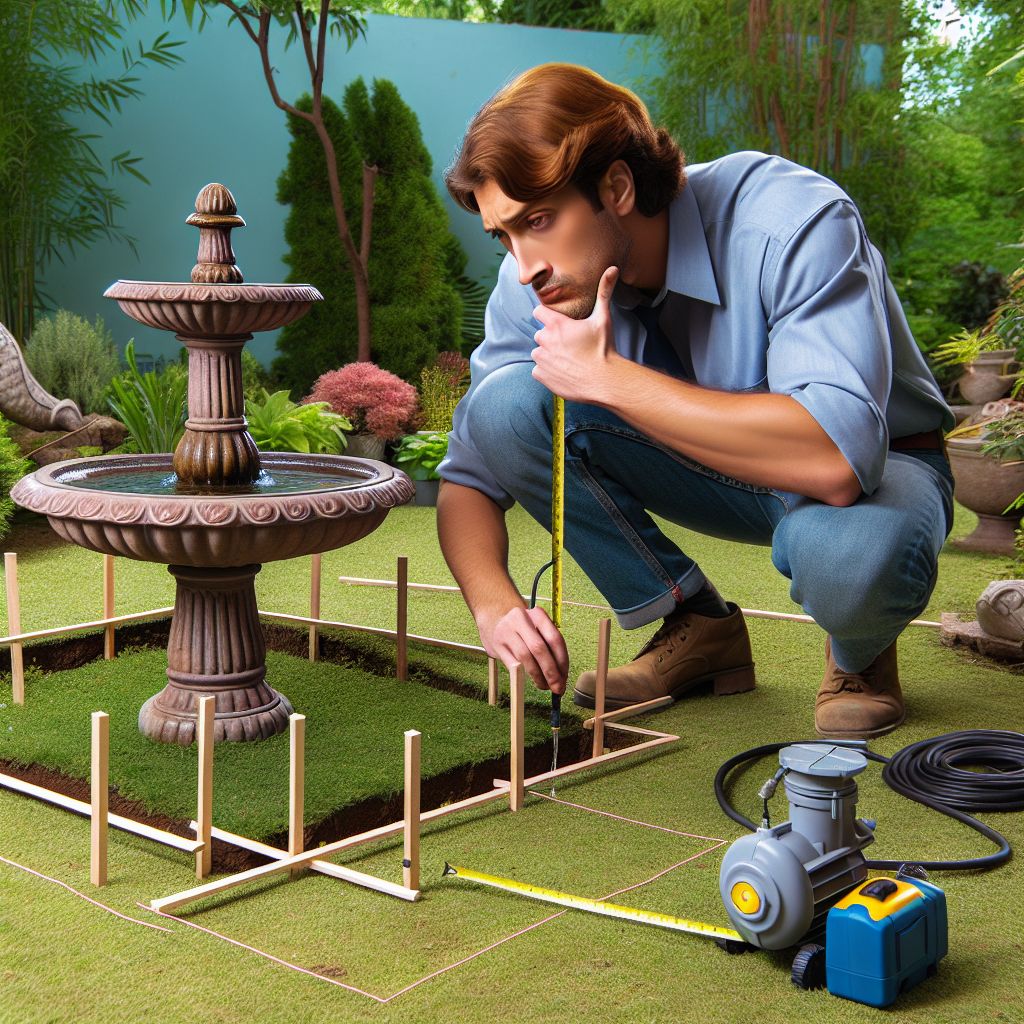
Once you’ve chosen the perfect spot, it’s time to stake it out. Use stakes and string to mark the area, then measure to make sure your fountain will fit. Keep in mind, you’re not just measuring for the fountain itself, but also for any extra space needed for pumps and tubing.
4. Check for Utilities: Avoid Unpleasant Surprises

Before you start digging, you need to make sure there are no underground utilities that you could hit. You don’t want to accidentally hit a water line or an electrical cable. You can call your local utility companies to mark any lines, or you can dial the national ‘Call Before You Dig’ number.
5. Getting the Site Ready

Now that you’ve picked your spot and made sure there are no utility lines in the way, it’s time to get the site ready. Clear the area of any debris, rocks, or plants that might get in the way of the installation. If the area is covered in grass, remove it and keep it somewhere safe if you want to replant it later.
6. Excavating and Preparing the Hole

Then, excavate a hole that fits the size of the basin for your fountain. The depth should be such that the basin is level with or slightly above the ground to avoid water accumulation around the edges. If your fountain is especially heavy, think about putting a layer of packed gravel at the base of the hole for additional stability.
7. Adding a Sand Layer and Positioning the Basin
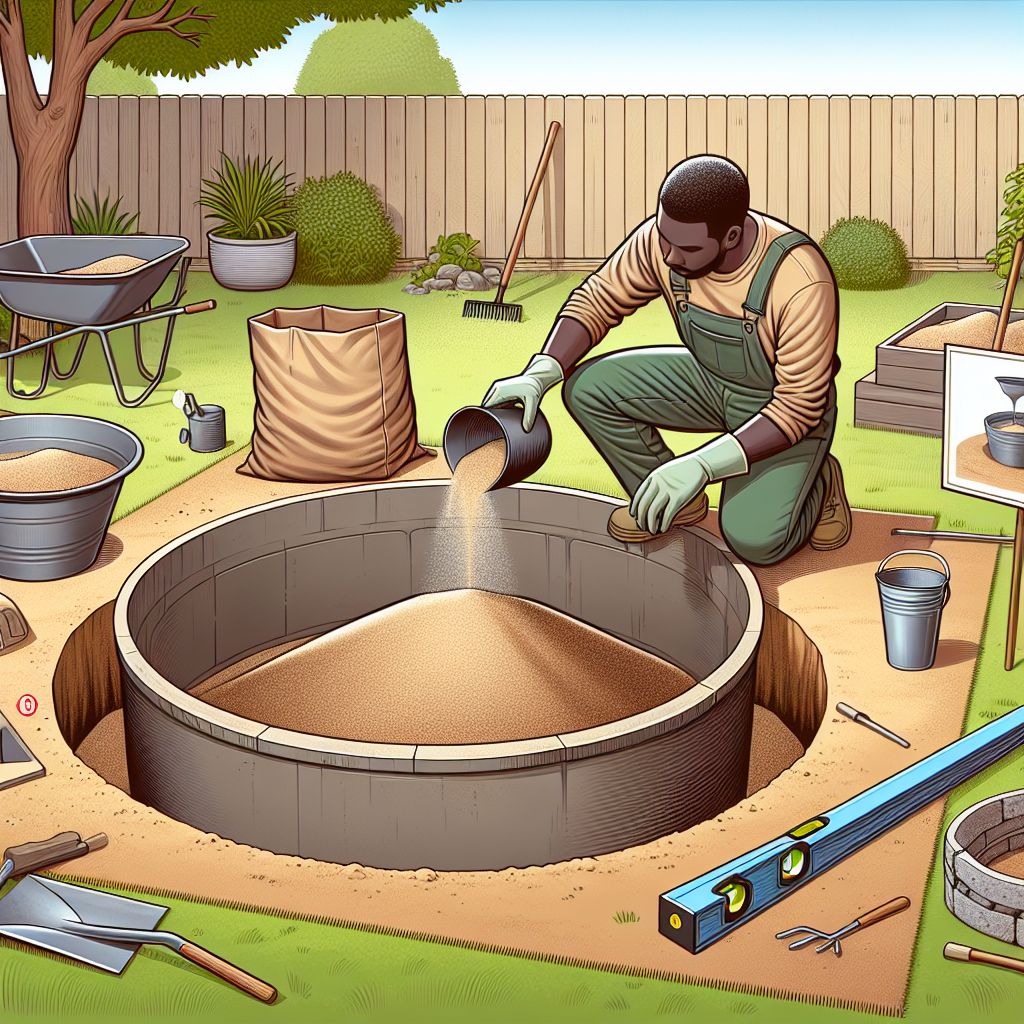
When the hole is all set, the next step is to put in a layer of sand. This will serve as a buffer for the basin, preventing it from getting damaged and assisting in keeping it level. Dump the sand into the hole and even it out. Next, put the basin on top and use a level to ensure it’s completely flat. If needed, add or remove sand to make adjustments.
8. Installing the Base

Next up is the foundation. Your fountain’s base must be stable and flat to avoid any leaning or movement over time. If you’re using a pre-made basin, make sure it’s flat in the hole you’ve dug. If your fountain requires a concrete base, mix and pour the concrete following the manufacturer’s directions and let it fully harden before moving on.
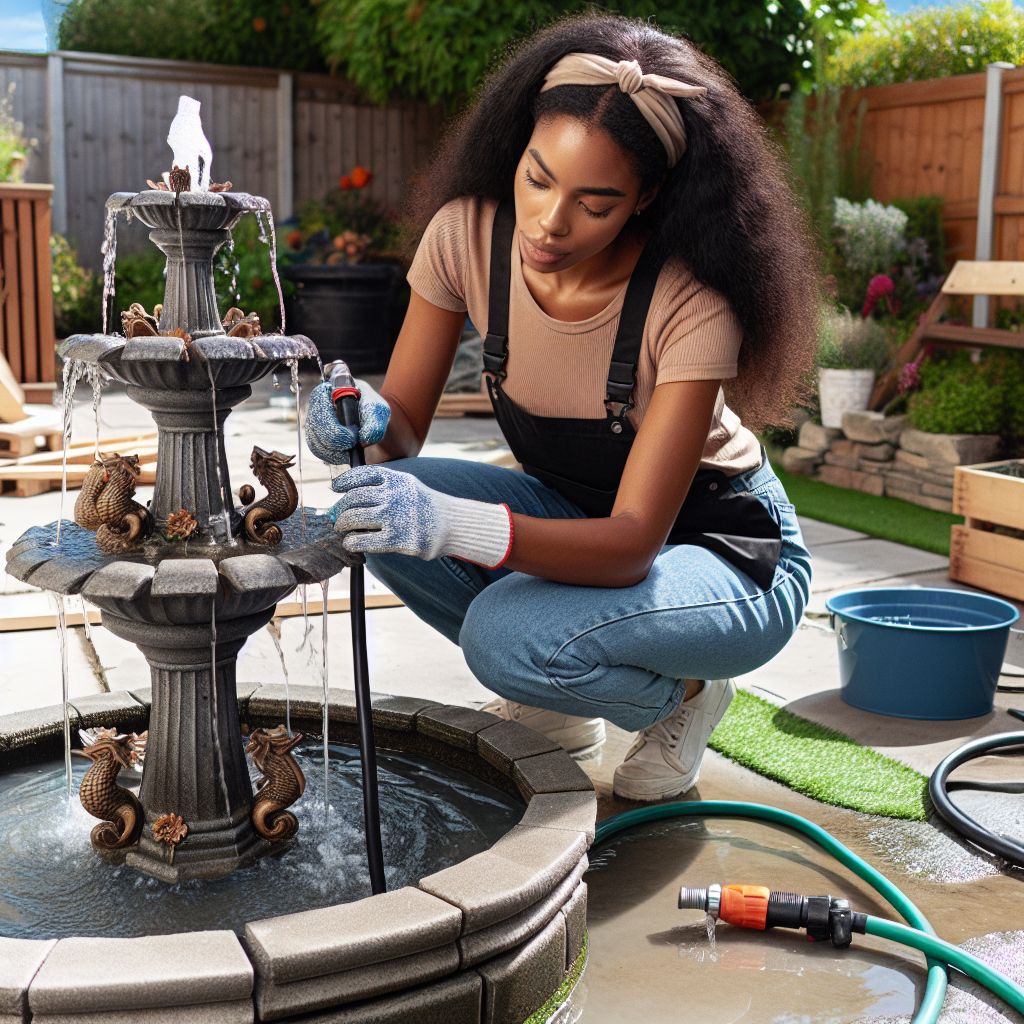
9. Setting Up the Basin and Pump

Now that the base is ready, gently position the basin in place. Make sure it’s level, then begin setting up the pump. The pump is the key component of your fountain, as it circulates the water and creates the soothing sound and movement. Follow the instructions provided by the manufacturer to attach the pump to the basin, which usually requires some basic plumbing work.
10. Mastering the Plumbing: Waterways and Connections

Ensuring the plumbing is correct is crucial for a well-functioning fountain. Connect your pump to the water source, this could be a nearby faucet or a water line buried in the ground. If you’re using a hose, ensure it’s buried underground to maintain a neat garden and avoid any tripping hazards.
11. Final Assembly

Almost done! With the pump installed and the plumbing in place, it’s time to put together the rest of your fountain. This usually includes stacking the tiers, positioning the fountainhead, and adding any decorative elements.
12. The Final Touch: Watering and Testing Your Fountain
Add water to your fountain, paying close attention to the pump’s intake level. It’s important to note that most pumps need to be fully covered with water to function properly. After this, switch on the pump and watch as water flows through your fountain for the first time. It’s a beautiful sight that marks the successful completion of your DIY outdoor fountain project.
Advice for a Smooth Installation
Keeping Your Fountain’s Water Clean: The Importance of Filtration
Using a filtration system is key to keeping your fountain water clean and clear. Whether it’s a feature that’s built into your pump or an additional filter, clean water not only looks better, but it also helps to prevent damage to the pump and keeps your fountain operating smoothly.
Winter Care: Getting Your Fountain Ready for the Cold
If you live somewhere where temperatures drop below freezing, it’s important to get your fountain ready for winter to avoid any damage. Before the first freeze of the season, make sure to drain your fountain completely and take out the pump. Keep the pump inside to keep it safe from the cold. If you can, cover your fountain or keep it inside to keep it from cracking or getting weathered.
Conclusion
Putting in an outdoor water fountain is a task that can bring a lot of satisfaction and charm to your house. By following these steps and tips, you can make a peaceful haven that’s both visually pleasing and calming to the senses. Take it slow, plan thoroughly, and soon you’ll be enjoying the atmosphere and pride that comes with a DIY job done well.
Common Questions
How can I make sure my water fountain stays level over time?
Begin by setting up your fountain on a firm, even base. Regularly check the level, particularly after heavy rainfall or snow, and make adjustments as needed. Using a strong base material such as compacted gravel or concrete can also aid in keeping the fountain level. For more detailed guidance, consider exploring the best practices on luxury water features selections.
What kind of upkeep is needed for an outdoor water fountain?
You will need to clean your fountain regularly to get rid of algae and debris. You should regularly check the water level and refill it as necessary. You should also inspect the pump and clean or replace the filter as recommended by the manufacturer. You should also winterize it to prevent damage from freezing in the winter.
What to do when your water fountain ceases to function?
Ensure the pump is connected to the power supply.
Examine the pump for blockages or debris and clean it if necessary.
Confirm that the water level is sufficient to cover the pump intake.
If the issue continues, refer to the manufacturer’s troubleshooting guide or think about seeking professional help.


Leave a Reply